So you’ve just picked up a new surfboard and you can’t wait to hit the waves? Before you do, take some time to glass the board. Glassing your board is an important step in protecting it from damage and ensuring that it stays in good condition for years to come.
In this article, we’ll walk you through the process of glassing your surfboard and talk about different methods of glassing so that you can get out there and start surfing!
What is glassing a surfboard and why do it?
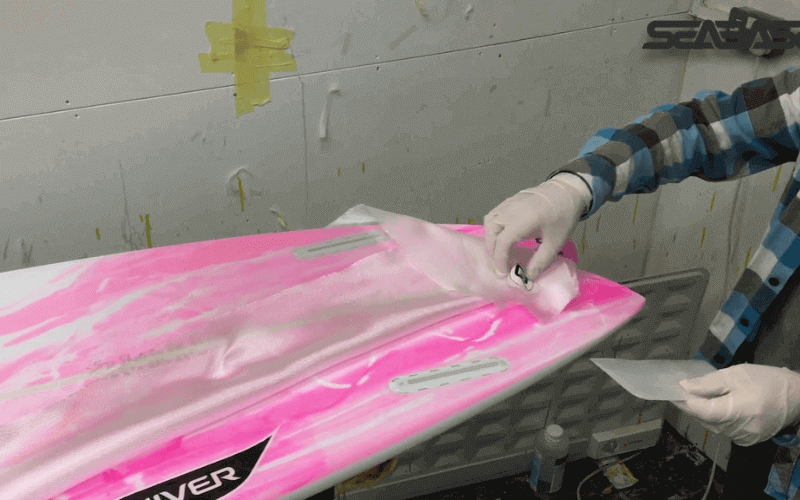
Glassing a surfboard is the process of applying fiberglass cloth and resin to the surface of the board to protect it from water damage and wear and tear.
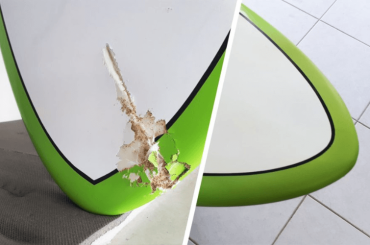
Without glassing, your surfboard would be much more susceptible to dings and dents and the lifespan of the board would be significantly shortened.
Glassing also adds strength to the surfboard, making it less likely to break in half if it hits something hard (like a rock). That’s why all the professional surfboards you see are always glassed – it’s just part of the process!
How to glass a surfboard?
Follow the simple steps to glass your surfboard:
- Make sure the surface of your board is clean and free of any dirt or debris.
- Cut the fiberglass cloth to size. You’ll need enough to cover the entire surface of your board.
- Wet out the fiberglass cloth with resin. Be sure to saturate it completely so that it’s saturated but not dripping.
- Apply the fiberglass cloth to your board, starting at the nose and working your way toward the tail.
- Use a roller or brush to smooth out the fabric and remove any air bubbles.
- Allow the resin to cure for 24 hours before sanding and applying a finish coat of resin.
Different types of glassing methods
Different types of gassing methods will achieve different results, so it’s important to know what you’re looking for before you start glassing your board.
Here are the 5 most common types of glassing methods:
1) Hot coat/spray-on method
This is the quickest and most popular method of glassing a surfboard. A hot, liquid resin is sprayed onto the surface of the board and then a layer of glass cloth is laid over top. The whole thing is then left to cure (harden) in the sun or a special curing oven.
2) Hand-layup method
This is a more labor-intensive method of glassing, but it’s great for getting a custom finish on your board. With this method, you’ll lay out the glass cloth on your surfboard and then brush or roll on a layer of resin.
Once the resin is tacky (not wet), you’ll lay another layer of glass cloth over top and continue until all the layers are in place.
3) Infusion method
This is the newest method of glassing a surfboard and it’s becoming more popular because it’s said to produce a lighter and stronger board. With this method, you’ll lay out the glass cloth on your surfboard as usual.
Then, you’ll place the board inside a special bag and vacuum seal it. This will suck all the air out of the bag and infuse it with resin. The whole process is then repeated until all the layers are in place.
4) Double-bias method
This is a custom glassing method that’s typically used on raceboards or high-performance boards.
With this method, you’ll lay out two pieces of glass cloth at right angles to each other (forming a cross). You’ll then brush or roll on a layer of resin and repeat the process until all the layers are in place.
5) Quad-bias method
This is another custom glassing method that’s similar to the double-bias method, but with four pieces of glass cloth instead of two. This creates a stronger and lighter board, but it’s also more labor-intensive.
Now that you know the different types of glassing methods, you can choose the one that’s right for you and your surfboard.
What type of glass should you use for your surfboard and why?
The type of glass you should use will depend on the type of surfboard you have and the conditions you’ll be surfing in.
Here are the most common types of glass used for surfboards:
1) Polyester
This is the most common type of glass used for surfboards. It’s strong and durable, making it a good choice for beginner and intermediate surfers.
2) Epoxy
This type of glass is becoming more popular because it’s lighter and stronger than polyester. It’s also more resistant to water damage, making it a good choice for surfers who spend a lot of time in the water.
3) Carbon fiber
This is the strongest and lightest type of glass, making it a good choice for race boards and high-performance boards. It’s also the most expensive type of glass, so it’s not always practical for everyday surfers.
In my opinion, the best type of glass to use is epoxy. It’s strong and light, making it a good choice for all types of surfers.
How to cut the glass to fit the surfboard?
When you’re glassing your surfboard, you’ll need to cut the glass to fit the shape of the board. Here’s how to do it:
- Measure the length and width of the section of the board that you’ll be glassing.
- Cut a piece of fiberglass cloth to size, using sharp scissors.
- Wet the cloth with resin, then lay it over the section of the board that you’re glassing.
- Use a squeegee to spread the resin evenly over the cloth.
- Trim the excess cloth from around the edges of the board, using a sharp knife.
- Allow the resin to cure for 24 hours before sanding and polishing the surface.
Tips for finishing and protecting your newly-glassed surfboard
Now that you’ve glassed your surfboard, it’s time to finish and protect it. Here are a few tips to help you do just that:
- Use sandpaper to smooth out the surface of the board. Start with coarse-grit sandpaper and work your way up to a finer grit.
- Apply a clear coat of resin to the surface of the board. This will protect it from UV damage and make it easier to clean.
- Wax the board with surfboard wax. This will create a barrier between the board and the water, making it easier to paddle and preventing the board from getting damaged.
- Store the board in a cool, dry place. This will help prevent the board from warping or cracking.
By following these tips, by taking proper care of it, you can keep your newly-glassed surfboard looking like new for years to come.
FAQs – How to glass a surfboard?
How long does it take to glass a surfboard?
The amount of time it takes to glass a surfboard will depend on the size and type of board, as well as the type of glassing method you’re using.
Generally speaking, it will take anywhere from 1-2 hours to complete the process.
How much resin does it take to glass a surfboard?
It takes about 32 ounces of resin to glass a standard surfboard. This includes both the fiberglass cloth and the resin itself. For a custom or specialty board, you may need more or less resin.
It is always best to consult with a professional surfboard shaper or glasser before starting your project.
How much money do surfboard shapers make?
There is no one-size-fits-all answer to this question, as the amount of money that surfboard shapers make will vary depending on their experience, location and the type of boards they make.
Generally speaking, most surfboard shapers charge between $50 and $100 per hour.
Is s-glass better than E-glass?
It depends on the specific project you’re working on. In general, however, E-glass is a better choice for beginners, while s-glass is better suited for experienced surfboard builders.
How much does Low-E glass cost?
The cost of Low-E glass will vary depending on the specific project you’re working on. However, in general, Low-E glass costs about 10-15% more than regular glass.
For example, a 4’x8′ sheet of 3/16″ Low-E glass will cost about $45, while the same size sheet of regular glass will cost around $40.
Which is better: fiberglass or carbon fiber?
There is no clear answer as to which material is better: fiberglass or carbon fiber. Both have their advantages and disadvantages that must be considered before a decision can be made.
- For instance, carbon fiber is much stronger and lighter than fiberglass, but it is also more expensive.
- Fiberglass is less expensive and still quite strong, but it is not as light as carbon fiber.
- Ultimately, the decision of which material to use depends on the specific application and what properties are most important.
Generally speaking, carbon fiber is the better choice when weight and strength are the most important factors. Fiberglass is a better choice when the cost is a primary concern.
Wrap Up
Now that you know how to glass a surfboard, go out and give it a try! With a little practice, you’ll be able to produce high-quality results. Just remember to take your time, be patient and have fun with it.
Glassing a surfboard is not as difficult as it may seem. With the right tools and materials, you can create a beautiful and sturdy board that will last for years.


